I started with a Grand Wardrobe Box from U-Haul. The dimensions are 24" x 21" x 48".
The first thing I did was to cut off all of the top flaps (I did not cut off the bottom flaps). If you look at the picture of the box on the U-Haul website you'll see that one of the flaps on one of the narrow sides is longer than the rest. After that I cut a straight line all the way down the box and through the bottom flap.
Next I laid the box out flat and cut a hole 30" x 14" about 81/2" from the top. After that I got down to painting.The first two coats were just white acrylic craft paint so that the printing on the box wouldn't show through. Next I painted the sides in a metallic blue tempera paint with 2 or 3 coats. The center panel I painted with chalkboard paint so the princesses could write the name of their show on it. So that the boarders of the chalkboard wouldn't show I hot glued a strip of sequenced trim I got from the fabric store. I had hopes that the light shinning off the sequence would look like light bulbs around a marquis.

Next I made some curtains out of scrap fabric I had on hand. Instead of a hem around the sides and bottom I used double folded bias tape and just sewed it around. Once that was on I turned the top down and made a seam big enough to insert the dowel rod I purchased, which I believe was a 3/8", from Home Depot. I got the smallest size that didn't bend easily.
When the curtains were ready I put them on the dowel rod and used a knife to get a hole started so that I could push the dowel through. Then to secure it on the outside of each end I screwed on a nut, purchased at the same time as the dowel rod. I just took the dowel to the hardware section and tried different sized until I found the one that would screw on. As I twisted them on they made the grooves necessary. Note: I used a soft wood dowel, I think it is poplar. I'm not sure how easy this would have been with the oak dowel.
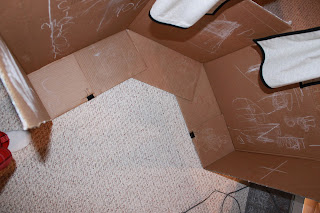
Once it was all finished I used binding clips I had on hand to secure the cut back flaps down to the side flaps. As you can see the inside of the box serves as a board for play notes :) They can be erased with a chalkboard eraser but they don't come off quite as neatly as they do on the chalkboard paint. That might be an upgrade for me, to paint the inside with the chalkboard paint also.
We had a few puppets already but I have also made more out of felt. Felt is great because you don't have to finish the edges and once you sew the sides together you can just use fabric glue to attach the details. As soon as I can figure out how to put a template up I'll do it for the basic shape of the puppet and then you can let your creativity take off!


No comments:
Post a Comment