Thursday, June 16, 2011

Growth Chart

After all the building that I have been doing I have amassed quite a pile of scrap wood in my garage. Since we rent I decided to use a piece to make a growth chart for the Princesses. I had a scrap of 1/4" plywood that was 1'x6'. The perfect size! I sanded it and painted it white (the same white I used in my bedroom makeover. Use what you have, right?)


Once it was dry I got out the craft paint and painted a green vine and leaves with a 1" foam brush.


Next, I used my Silhouette to cut the flowers out of scrap book paper the Princesses picked out. I glued them on using Mod Podge. I didn't, however, seal it with Mod Podge because I didn't know how easy it would be to write on it with a pen.


Then, I painted some round wood pieces that I had in colors to match the flowers. Once they were dry I used a hot glue gun to attach them. I also painted some wooden butterflies and hot glued them on too. Then, I used a small paintbrush to draw the swirls on under the flowers.


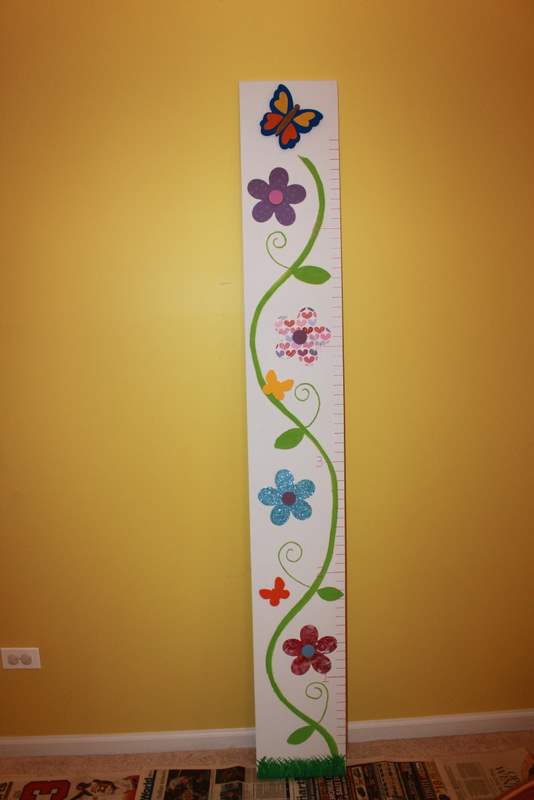
The final touch was measuring lines. They don't really show up in this picture but I used a rose pink paint pen and a tape measure. I made the inch lines one inch long and the feet lines two inches long. I also wrote the numbers just to the left of the feet lines with the paint marker.

Now I can't wait to decorate the rest of their room with this flower and butterfly theme!

Finished Quilt

Some of you may remember the post Q is for Quilt. Well, I have finally finished sewing it! I had the front/top all sewn and pinned together for quilting about two weeks after that first post. However, it sat in my sewing room while I tried to decide how to quilt it. This past weekend I finally decided to use stitch in the ditch so that the squares would really stand out. After all the princesses really worked hard on them!


Here it is in all its glory! I'm thinking that Princess Little is going to be my sewer. She was in the sewing room with me through the entire process. You never know, though, Princess Big may surprise me :)

Duvet


The finishing touch for my bedroom makeover was a duvet cover. It was really easy! I used these instructions from Design Sponge. I love it! Now I need to make one for the Princesses.

If you are wondering why you never get a photo of the entire room at once it is because of the icky color on the walls. I'm sure you are thinking "just paint them" but we rent and that is not an option right now. However, if we ever move someplace where the wall color "goes" I'll be sure to show you :)

Dresser Change

After the end of bed bench I repainted the tall dresser that we had in our room. I also made new drawer pulls for it and here's how it turned out.

End of Bed Bench

I know it has been forever since I last posted anything but I haven't been idle! Here is one of the projects that I have been working on.


It's my end of bed bench! You're probably thinking that the construction might be a little faulty with a sag in the middle, but I assure you it is just that I didn't pull the fabric evenly when I was stapling it to the top. I used the same plans from Ana White that I used for my fabric storage. The measurements are the same, I just added one more cubbie. After this picture was taken and King Daddy sat on it I decided it needed one more leg in the middle so I cut a piece of 1"x4" the same width as the bench, painted it and screwed it in through the inside of the 3rd cubbie.

Even with the fabric problem, which is an easy fix when I have the time, I like the way it turned out.