Monday, January 31, 2011

Baby Doll Changing Table

I have finally gotten both Princesses out of diapers/pull-ups and, wouldn't you know it, for Christmas they got dolls that wet! Now I'm teaching my babies how to change a baby. Sigh! I don't know if any of you out there have these dolls but they only come with one or two diapers. Well, that just isn't enough. When I priced a package of doll diapers it was outrageous! My solution was to go buy the smallest package of the store brand for newborns. These fill well enough as far as we're concerned. Since it's just water (I didn't give the Princesses the "juice" that makes them "poop") we let the diaper dry, refold it and put it back in the stack. My only issue with this system was all the diapers around the house that didn't have a home :)


I started with, you guessed it, two cardboard boxes from my stash. I prepped the boxes in the same way I did for the dress-up clothes shelves which you can see here. I used the flaps I cut off to make the guard rail. I wrapped them in one piece of contact paper. Then I attached them by wrapping a piece of contact paper all the way around and into the box.


Next, I made a changing pad with some fabric from my stash. I just sewed two pieces together and stuffed it with a piece of quilt batting. After sewing it closed I top stitched all the way around the edges and twice lengthwise.


To make the boxes for the diapers I used the same method as for these using tissue boxes.


What self respecting changing table does't have wipes? I used an old empty wipes container that I had. Then, I filled it with paper towels. To get the pop-up action I folded each towel in half and then z folded. Next, I tucked the ends into a "chain". 


The last element was a "dirty" diaper pail. I just picked one up at the dollar store. Now we need a wet baby!

Friday, January 28, 2011

Number Chart

Princess Big can count to 100! She totally surprised me by doing it in the car on the way to ballet last week. Now Princess Little is in a hurry to catch up. She's 18 months younger but she doesn't get that. If Princess Big can do it then I can too seems to be her motto. In order to help her achieve her goal I made a number chart from 1 to 100. Of course I had to make it usable to Princess Big as well so here's what I did.


First, I punched out 100 squares with my 1.5" square punch. I did 10 different shades of 10 colors. 


Then, I used sticky back velcro dots. I put one side on the square. Then, I put the other side on the velcro on the square. Then I peeled the second side off the paper and lined it up on my poster board and stuck it. This way I was able to get all of the squares lined up the way I wanted.


After I got all of the numbers on I printed out the letters from my computer and cut them out. I just glued them on to a piece of scrapbook paper that I glued to the top of the poster board.

Now Princess Little can practice counting to 100. For Princess Big we can start working on counting by 2's, 5's and 10's by removing the numbers we don't need.

Wednesday, January 26, 2011

Painting Snow

I'm sure you're all wondering what I've been up to with the Princesses in the way of art and crafts for the last few weeks. To be honest it hasn't been much. I've been busy making things for them instead of with them. Well today I changed that. I found this great idea for painting snow here. Since we are doing P for Penguin this week I felt we needed to go play in the snow like penguins!


I got these spray bottles at the Dollar Tree and fill them with water and food coloring. I put about 20 drops in the bottle and that gave us a nice color. Then I made sure all the sprayers worked well and adjusted the stream to a mist.


Then, I had to get us all bundled up in our snow gear!


Here is Princess Big spraying yellow. No, I have not yet taught them to avoid the yellow snow :)


Here is Princess Little working with the purple. I found out that the bottles are a little hard to work with when you have such little hands that are stuffed into fluffy mittens. "Real" pictures just weren't happening. That's OK, we had fun anyway!


The best part about playing outside in the snow, according to Princess Big, is the HOT CHOCOLATE!

Monday, January 24, 2011

Magnetic Letters

In our quest to better reading I spend a lot of time with the Princesses on spelling. King Daddy and I were given a game called Bananagrams. I don't know if you've seen it but it's like Scrabble without the scoring. I took it out one day to play, slightly modified, with Princess Big. She loved it and is constantly asking to play with it. Well, King Daddy and I also love to play it so I didn't want any of the pieces lost. That means the Princesses didn't get to play with it as often as they wanted :( That just fueled my creative juices and I made one for them with a few modifications. Here's how I did it.


I used left over art board from the lacing cards I made for Prince T back in October. I made grid of .75 inch squares and cut them out. This time I used a box cutter instead of my X-Acto knife and what a difference it made! According to the Bananagrams game I needed 144 tiles: A=13, B=3, C=3, D=6, E=18, F=3, G=4, H=3, I=12, J=2, K=2, L=5, M=3, N=8, O=11, P=3, Q=2, R=9, S=6, T=9, U=6, V=3, W=3, X=2, Y=3, Z=2


I took some time in deciding how to color the squares. I couldn't just leave them white, what kind of crafter would I be! I decided to go with covering them. I thought it would be easier than trying to paint them. I happened to have this 1.5 inch square hole punch so I took it to sheets of 12" x 12" scrapbook paper. I did the vowels (60) in one color, pink, and the consonants (84) in another, blue.


Next, I pulled out the Mod Podge and glued the art board in the center of the paper square.
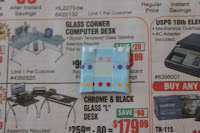


Then, I glued the sides down. I'm not going to lie to you, the process was long and tedious!


Once the Mod Podge was dry I wrote the letters on each tile with a paint pen (I bet a sharpie would work just as well).


Next, I applied the Mod Podge as a sealer. I tried this method where I stuck a thumb tack in and "painted" the sides and top. I thought I would be able to let it dry while sitting on top of the tack. Didn't work. First, sometimes the tile would begin to rotate on the tack and then fall off. If I was able to complete the sealing and get it standing up right one of the children (that includes King Daddy) would bump the table and they would fall down. I finally gave up and just painted them in my hand and then laid them down on a piece of wax paper. Once the tops were dry I sealed the bottoms with a layer of Mod Podge. I probably should have done 2 coats but to be honest this part was also long and tedious and I just couldn't do it!


The last step on the tiles was to put magnets on them. I got this roll of magnetic tape and just cut it into squares. Then, I removed the backing and just stuck it to the center of the back. I'm not sure how that's going to stand up to a 3.5 and 5 year old but if they come off I'll just try gluing them back on.


Of course we had to have something to carry the tiles in. Bananagrams comes in this little yellow pouch that looks like a banana. I whipped this one up out of some scrap fabric that I had and a zipper that I got when my grandmother died and is probably older than I am.


Finally, I pulled out a magnetic dry erase board that was just sitting in a closet (I think it originally came from Target). Here are the Princesses making words. They were so excited that I got about 30 minutes of quiet while they worked! It's wonderful to watch them sound out words while spelling. Princess Big is also fabulous with helping Princess Little with the words she wants to spell.

Monday, January 17, 2011

Covered Boxes for Dress-Up Jewelry

And now for our last installment of Operation Toy Clean-Up!


What's the first thing I did? You guessed it, I raided the box collection! Perhaps you're getting an idea just how big that collection is. If not, I'll just tell you I've barely scratched the surface ;) For this project I chose the smallest boxes I had. They mostly came from purchases from Amazon.com.


Next, I cut the top flaps off at the score mark. Then, I taped the bottom closed. To keep pieces of jewelry from finding their way under the inside flaps I glued them down.

While the glue was drying I let the Princesses choose the paper they liked from my scrapbook paper supply. Once all the paper was chosen I picked a paint color that could be found in all the different papers.


In this case the chosen paint is blue. As you can see I painted the entire inside and let it dry.


Next, I cut the paper. For the bottom piece I cut it about 1 to 1.5 inches bigger on all sides. For the two long sides I cut it 1 to 1.5 inches bigger on three sides (I left the bottom edge flush with the bottom of the box). For the short sides I cut it 1 to 1.5 inches bigger on the top side (I left the bottom edge flush with the bottom of the box and the side edges about .25 inch shorter).


I started with the bottom of the box by spreading a medium layer of Mod-Podge all over it. Then I laid the paper over it and smoothed it down to get the wrinkles out. 


Next, I cut the corner and glued the overhang up the side of the box.

After doing this to both matching sides I did the other sides. Once those were done I glued the small flaps to the first two sides to close the corners. Then, using a medium layer, I Mod-Podged the entire bottom and up the sides over the polka-dot paper and let it dry, twice.


After the bottom was dry I started with the long sides. I glued the paper down with the bottom flush with the bottom of the box and the sides overhanging by the same amount (or mostly so, I eye-balled it). Then I glued the overhang down on the short side of the box. 


Then, I glued the top overhang down on the inside of the box starting with the small side piece.


Next, I did the short sides of the box. I glued the paper down with the bottom flush with the bottom of the box. 


Then, I glued the overhang down the inside of the box. 


The last step was to Mod-Podge the entire inside and outside sides twice just like the bottom and let it dry.


If you look in the top left compartment and the top middle compartment you'll see four of the six boxes I made. Each one is filled with something different: necklaces, bracelets,tiaras and masks. The other two boxes I made were larger to store some musical instruments and some felt toys. Due to the larger size I used old wrapping paper but the process was the same. 

Once I got this massive project done I was ready to go through all of the toys with the Princesses and decide what we should give to charity. Since we hadn't done this, ever, I ended up with two large plastic totes full of toys! I've decided five years is too long to wait! 


I still have a few organizational projects in the back of my mind that run along the free or very cheap line but for now the results are fantastic! You can see the floor :)

Dress-Up Clothes Shelves

Dress-up clothes shelves, as promised.


For this installment of operation toy clean up I, again, raided my box collection. If you have babies or toddlers still in diapers or pull-ups I highly recommend saving the boxes! I have used these for several projects, as well as, for moving. Anyhoo... I came up with 7 pull-up boxes of the same size. Then, I cut off the bottom flaps (these don't meet all the way in the middle).


Next, I used white acrylic craft paint to cover the writing on the sides of the boxes.


Once the paint was dry I connected the boxes by using a length of contact paper that I folded over the edges. I did this for all six boxes on both the inner sides and the inner top/bottom. I left the outer sides for the last step.


Next, I covered the sides. I laid the contact paper out and took the backing off. Then, I put the connected boxes on the paper and rolled it all the way around. I left a little overlap on the front and back. For the back, I just folded the paper up like wrapping a gift. For the front I cut a slit and folded the paper over the edges.


Here they are. 


With the 7th box I cut it in half, wrapped it top and bottom in contact paper and slid it in one of the compartments to create additional shelves for the shoes.

Up next, covered boxes for dress-up jewelry.