I started by cutting out my fabric. I cut two pieces of white flannel 13"x21" and three pieces of blue striped flannel 4.5"x13".
Next, I pressed the long edges of the blue stripped flannel down .25".
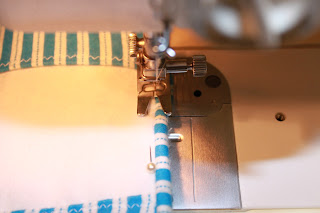
Then, using a zig zag stitch I sewed one of the edges.
Next, I cut a piece of quilt batting slightly larger than the white back ground.
Then, I pinned everything together. On the bottom is one piece of the white, then the batting, then the second piece of white, and last the blue stripped pockets. I sewed, using a zig zag stitch, the bottom of the pockets in place. Then, I sewed the vertical zig zag stitches that separate pockets. I did three pockets approximately 3.5" (I just eyeballed it).
To make the binding I cut enough strips of fabric 2" wide to go around the entire perimeter.
I turned them into one long strip by sewing them together like this. Pressing the seams open.
Then, I folded the strip in half and pressed it like this.
Next, starting in the center of one side I pinned the binding to the caddie with the raw edges lining up.
To do the corners, I stopped sewing about .25" from the end.
Then, I folded the strip up like this...
And then straight back down like this and pinned it. Then I sewed down this edge and repeated the corner process until I got back to where I started. Before I sewed over the end where I started, I folded the beginning edge over about .5". Then, I sewed the ending edge on top of the folded beginning edge. Once the binding was completely sewn on I trimmed the batting and fabric .25" from the stitching.
I made the hanging tabs by sewing a strip of fabric right sides together and then turning it right side out. Then, I cut it into three pieces. I folded the pieces in half to have ready for the next step.
Next, I folded the binding over the edge to the back and pinned it in place. Placing the tabs along the top edge. I matched the raw edges and then folded the binding over the tabs. This means that the top of the tab was pointing down.
Then, I sewed all the way around the binding in the seam. This is called stitch in the ditch.
Once it was all sewn I turned the tabs up to the top and stitched in the ditch over them. Now they are pointed the correct way.
Then, I cut a dowel rod the correct length and slid it through the tabs. I tied some white ribbon to the ends and knotted a loop in the center. The last thing to do was hang it by the door with a picture nail!


No comments:
Post a Comment