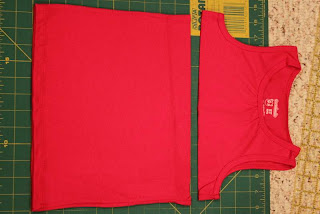
First, I measured the princesses in the back from just below the neck to the length I wanted to use. Then I took the tank top and cut it about 1.5" below the arm hole.
Then, I cut the material. To get that measurement I took the full length measurement subtracted the length of the cut tank top and then added 1.5". (The 1.5 is the seam and hem allowance I used. If you want to do a proper hem use 1.75" instead of 1.5".) For Princess Little the finished measurement was 23" and the tank top length was 5.5 so the bottom length I needed to cut was:
23-5.5= 17.5 then 17.5+1.5=19". I cut my material 19" then trimmed the selvage and cut it in half.
I put the right sides of the material together and sewed the side seams using a 1/2" seam allowance. Then, I pressed the seams open.
Next, using the longest stitch on my machine (a basting stitch) I sewed just the skirt 1/2" around the top. I always start and stop my stitching for hems and such along the side seam where it is less noticeable. I did the same for this but I did not overlap the ends so I could gather it easily. Once the basting stitch was done I held the two strings on the wrong side and pushed the fabric back until it couldn't be gathered any more.
Then, I tucked the tank top in (making sure the right sides of the material were together) and matched the side seams and pinned.
Then, holding the pinned sides I gently pulled until the skirt and top were the same width.
Next, I adjusted the gathers until they were evenly spaced across the width and pinned them in place for sewing. Then, I sewed the top and bottom together along the basting stitch.
Next, I ironed the tank top seam down toward the skirt and ironed the hem. I ironed the hem up about 1" and went around it with a small zig zag stitch. If I were making this for someone else's princess I would finish the hem properly by turning the raw edge under 1/4". Doing that would require me to add 1.75" in my calculation for the skirt cut.


No comments:
Post a Comment